


In the event you’re searching for a option to speed up your cooking process, you’ll love this easy recipe for homemade ginger garlic paste. With just a number of minutes of prep, you possibly can create an enormous batch to maintain in your refrigerator or freezer. It’s a lifesaver for busy days when you wish to whip up delicious Indian meals quickly.

Within the fragrant kitchens of Indian cooking, a jar of ginger garlic paste is as crucial as salt. It’s the guts of many Indian recipes and is utilized in the bottom of many curries, dals, and side dishes. Often, each these ingredients are peeled after which minced using a mortar and pestle before adding them to sauteed onions to make the curry.
Each ginger and garlic not only enhance the flavour of dishes but are also known for his or her medicinal properties. From helping with digestion to stopping cold, the advantages of this paste are many.
Once we discuss meal-prepping Indian food, one among the best ways to avoid wasting time is to have a bottle of garlic ginger paste within the refrigerator or freezer. You possibly can at all times use store-bought, however the ones I actually have used had a metallic taste, possibly due to preservatives, and that’s why I don’t like them.
Fortunately, this ginger garlic paste recipe is basically easy to make. You possibly can make an enormous batch, and it lasts within the freezer ceaselessly.
For more meal prep hacks resembling this garlic paste, and ginger paste, take a look at – Indian meal prep recipes.
Methods to pick ginger and garlic
Selecting the best ingredients is crucial when making ginger garlic paste. Here’s a guide to picking the perfect ginger and garlic in your paste:
Choosing Ginger
- Check for freshness: The ginger must have a firm texture, a smooth surface, and without wrinkling or blemish. Fresh ginger root typically has a skinny skin that scrapes off easily.
- Organic option: Go for organic ginger roots if available; they’re known for his or her strong and pungent flavor.
Selecting Garlic
- Firm to the touch: Garlic bulbs ought to be firm, with the cloves intact. Squeeze the bulb gently – it should feel solid and never give under pressure.
- Color: Search for a bulb with vibrant, white skin. Some varieties could have a purple hue, which can also be acceptable, but avoid any brown discoloration.
- Avoid sprouted ones: In the event you see green shoots emerging from the highest of the cloves, the garlic is past its prime and could have a bitter taste.
- Aroma: Good garlic should smell fresh and pungent. If there’s no scent or an off smell, it’s best to decide on one other bulb.
Methods to make and store ginger garlic paste
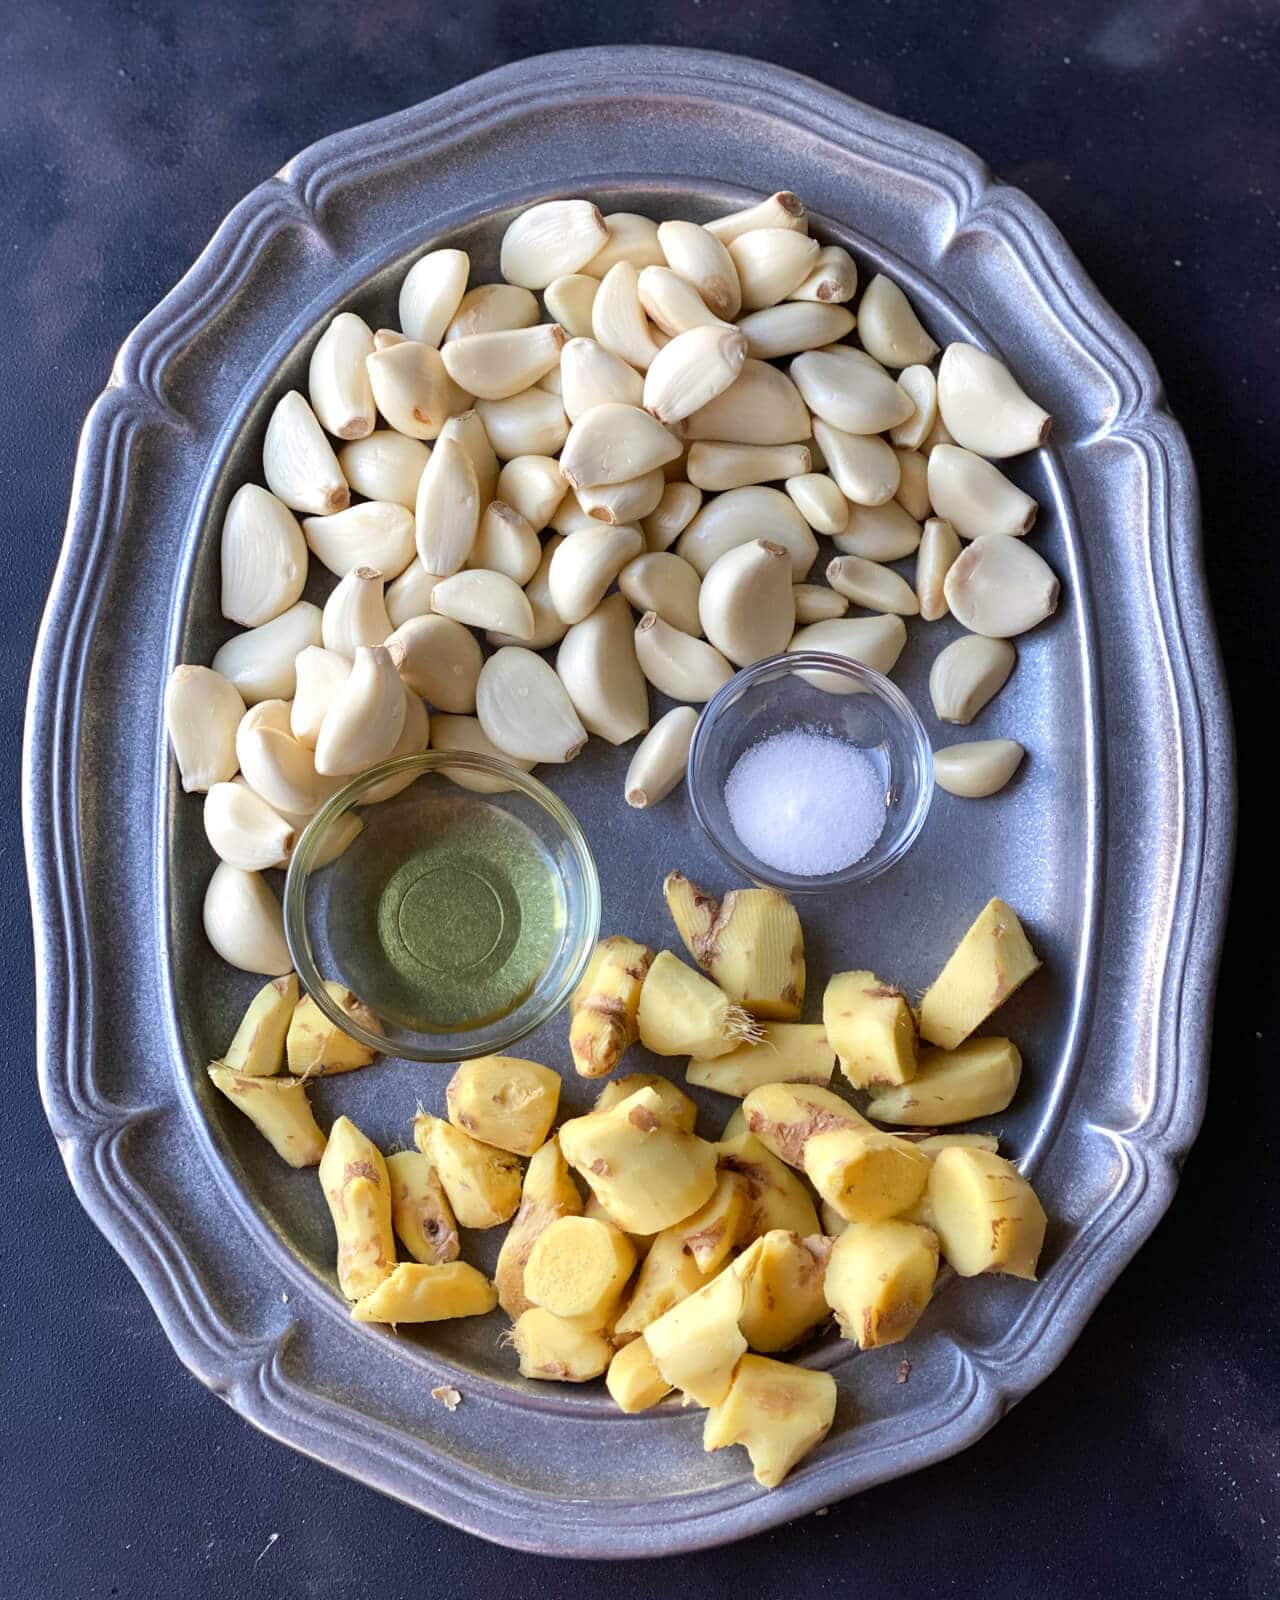
To make this paste, you would like 4 ingredients – ginger, garlic, oil, and salt. You’ll find these ingredients easily in your local grocery stores or any Indian store.
Before we jump to the recipe, let’s talk concerning the ratio of ginger to garlic on this homemade paste. You need to use each in a 1:1 ratio, but I prefer to make use of about 25% more garlic than ginger, especially if I’m using organic ginger because it is stronger.
Ginger-garlic paste: a step-by-step guide
- Peel the ginger and chop it into 1-2 inch pieces (makes it easier to mix).
- Peel the skin of the garlic or buy store-bought peeled garlic (which is what I do).
- Toss the ingredients into the blender jar or food processor together with oil and salt and grind them to a tremendous paste.
Note: An alternate option to make ginger and garlic paste is to grind and store them individually. That way, if a recipe calls just for ginger, resembling this coconut chutney, then you’ve got it handy.
That’s it! Your budget-friendly, better-than-store-bought homemade ginger-garlic paste is prepared.
Suggestions and Tricks
- Peeling ginger:
- Peeling is optional if using organic ginger—rinse well before use.
- A straight peeler is effective for removing only the skin and preserving the flesh.
- Peeling garlic:
- Place 3-4 cloves in a mortar and tap with the pestle to loosen the skins for simple peeling.
- Cutting the guidelines off the garlic cloves is optional.
- Preparing ginger for mixing:
- Cut ginger into small pieces to facilitate easier mixing and to guard blender blades.
- Increasing shelf lifetime of the paste:
- Use oil as a substitute of water to grind the paste, which acts as a preservative and helps maintain color.
- All the time use a clean, dry spoon when scooping paste from the container.
- Using frozen paste:
- Don’t thaw frozen ginger garlic paste cubes; use them directly.
- Return any unused cubes to the freezer promptly to preserve quality.
Note: The sulfur compounds in garlic get activated when it’s crushed or minced. If it shouldn’t be immediately used, it reacts with air and turns green in color. Nonetheless, it continues to be edible. Don’t throw away your paste if it turns green, which shouldn’t occur in the event you use the really helpful amount of oil on this recipe.
Storage instructions
Alright, now that we have now this huge batch ready, let’s ensure that we store it properly in order that it lasts for at the least 3-4 months. If you’ve got added oil and salt to the paste, your paste can last so long as 6 months within the freezer. Let’s learn how.
How do you preserve ginger garlic paste at home?
- Store within the refrigerator in an air-tight glass container for about 7-10 days.
- To preserve for 3-4 months, transfer the ginger garlic paste to an ice cube tray (preferably with a lid to avoid freezer burn), ensuring to go away some space for expansion.
- Once frozen, transfer it to a freezer bag like Ziploc or a reusable storage bag and store it within the freezer for as much as 6 months.
I exploit this silicone ice-cube tray to freeze the paste. It has a capability for about 2 teaspoons per crevice but I fill around 1.5 teaspoons to present room for the paste to expand.

How long does homemade ginger garlic paste last?
If you’ve got used oil and salt while making ginger garlic paste, it easily lasts within the refrigerator for 7-10 days, if no more, and for about 6 months within the freezer.
Methods to make ginger garlic paste with no blender
While not essentially the most efficient and fast way, you possibly can at all times use a mortar/pestle to make ginger garlic paste in small batches.
Is it obligatory so as to add oil to ginger garlic paste?
Using oil not only helps grind the ginger garlic right into a smooth paste but additionally helps preserve it. You possibly can at all times replace it with water.

Methods to use ginger garlic paste
Depending on how you’ve got stored the paste (refrigerator or freezer), there are two ways to make use of the paste –
Refrigerated paste – I exploit 1 tablespoon of this ginger garlic paste for dal recipes and about 2 tablespoons for curries like rajma (kidney beans curry) and chole (chickpeas curry). Note: Remember, this paste shouldn’t be cooked, so don’t forget to sauté it for a minute or two to eliminate the raw taste.
Frozen cubes – I exploit this ice cube tray and add about 1.5 teaspoons in each crevice. Two of those frozen cubes make one tablespoon. So use 3-4 cubes for curries and about 2 for dals. No must thaw them before using them.
This paste shouldn’t be just a vital condiment for Indian dishes but across all Asian cuisines. It’s also used for marinating meats, enhancing vegetable stir-fries, and taking off curries.
Listed below are a few of my favorite recipes where I depend on homemade ginger garlic paste for flavor –
- Langarwali dal – Satisfy your soul and your stomach with this flavor-filled langarwali dal – a creamy mixed lentil curry that cooks effortlessly within the Quick Pot. Pair it with jeera rice or cumin rice for a whole gastronomic experience.
- Restaurant-Style Dal Makhani – You’ve got to do that creamy and delicious Punjabi lentil curry that graces the menus of Indian restaurants worldwide. Learn the right way to replicate the flavors of this traditionally slow-cooked curry quickly in an Quick Pot.
- Quick Pot Rajma masala – Use your pressure cooker or Quick Pot to make this quick & delicious Dhaba-style Punjabi rajma masala. While you possibly can serve it with rotis, the mixture of rajma and chawal (rice) is what makes this dish truly special.
- Tadka dal – One-pot recipes are the perfect! That’s why you’ll love this Tadka dal (tempered dal) recipe – make it in an Quick Pot or a pressure cooker – and also you’ll have your meal ready very quickly.
- Chana masala – This vegan one-pot curry might be made in an Quick Pot in addition to a stovetop Pressure cooker. Get all of the deets on the right way to make this delicious curry at home!

Click on the celebrities to rate!
Homemade Ginger Garlic Paste Recipe
Whip up a big batch of homemade ginger garlic paste in minutes! Store it within the fridge or freezer to shorten future meal prep, it is good for quickly preparing Indian dishes on busy days.
Pin
Print
Save
Email
- 0.5 lbs (250 gms) ginger peeled and chopped
- 0.75 lbs (350 gms) garlic cloves peeled
- 3 tbsp avocado oil or oil of your selection
- 1 teaspoon salt
Prevent your screen from going dark
-
Peel and chop the ginger into 1 to 2-inch pieces.
-
Add chopped ginger, garlic, oil, and salt to a blender. Grind to a tremendous paste. Make it in batches, if needed. Note – In the event you are having trouble mixing it, be at liberty so as to add a number of teaspoons of oil to assist the method.
Storage Instructions
-
Store within the refrigerator in an air-tight glass container for about 7-10 days.
-
To preserve for as much as 6 months, transfer the ginger garlic paste to an ice-cube tray. Don’t fill it to the brim – ensure that to go away about 1/4th inch of space for expansion.
-
Once frozen, pop the cubes out and transfer it to a Ziploc or a silicone bag and store it within the freezer for as much as 6 months.
Disclaimer: Approximate dietary information is provided as a courtesy and may vary depending on the precise ingredients/brands used. If you’ve got health issues, please work with a registered dietician or nutritionist.
Serving: 1tablespoonCalories: 33kcalCarbohydrates: 5gProtein: 1gFat: 1gSaturated Fat: 1gSodium: 75mgPotassium: 72mgFiber: 1gSugar: 1gVitamin C: 4mgCalcium: 20mgIron: 1mg
Weight loss plan: Dairy-free, Gluten-free
Course: Basics
Method: Blender
Cuisine: Indian
This post was originally written on August 28, 2020, and was republished with additional information on Dec 15, 2023.
